Tag Archives: repairs

Life on the Hard: Boatyard Projects

We haul out Sugar Shack at Norsand Boatyard to complete lots and lots of boat projects.  The plan was to be “on the hard” for 5-6 weeks but a lot of projects have to be done in sequential order and cannot be done simultaneously.  We started booking contractors and work back in May to ensure that we could get all of the work done and be back in the water before Christmas.  Several blog posts will come out about this journey.

Last season in New Zealand we were able to complete a lot of upgrades, maintenance jobs, repairs, and a few miscellaneous projects.  We were tied to the dock at Town Basin Marina for almost 8 months where we upgraded to lithium batteries, repaired our salon window seals, replaced our main sail and genoa, replaced our dinghy and dinghy chaps, had a new cockpit enclosure made, new interior and exterior fabric for our cushions, new ceiling panels, new LED light fixtures, and new stainless counter tops and sink.  It was a lot!  (to read more about these upgrades, search our website for the specific blog post or click on the above links.

Hauling out

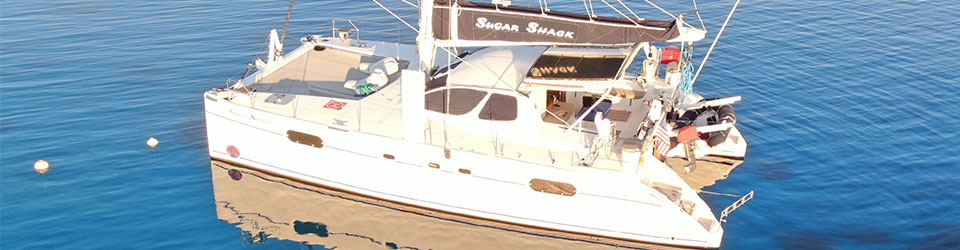
Hauling out and splashing always makes my heart race.  So many things can go wrong and yet we’ve been blessed with excellent workers at each yard.  We had a late haul out because we had to wait for high tide which was 4:00pm on our scheduled date.  We arrived and found the dock empty (which evidently was not normal).  The slipway manager was busy swapping trailers and we came in a smidge early so lucky for us another cruiser met us at the jetty to grab our lines. (top photo).  I was afraid I’d have to prove my non-existent Texas skills by lassoing the pilon.

Norsand Jetty

Norsand Jetty

Kevin, the slipway manager and Shane arrive and slowly walk Sugar Shack down the slip toward the ramp.  Another two workers showed up to toss us lines for the starboard side.  Once secured, Kevin rows a dinghy out to measure the exact placement of the trailer.

They use a large tractor to push the trailer into the water.  It has to be lined up right down the center of the boat.

They expertly manuever the trailer under our boat, without incident.  Once the trailer is in place, Kevin rows his boat out again to use the trailer’s controllers to set the supports on our bulk heads (the strongest part of the boat).  It is a slow, tediuous process, but we don’t rush them.   Slow is pro!

Coming Out of the Water

Once the boat is secured onto the trailer she is slowly pulled out of the water.  

Kevin and Shane blocked us on the trailer for the night right at the top of the slipway and smack dab in the middle of the yard.  Hello Norsand, Sugar Shack has arrived!

The Projects Begin Before We Are Even Blocked

The following projects are started early the next morning, before we are moved to our parking spot.

  • Removed both rudders (the original starboard rudder and the temproary rudder)
  • Removed both props
  • Removed both saildrives (this is done by Whangarei Marine as they will service them)
  • Evaluated our vinyl/stickers with Vital Signs and he shows us how to remove them

We are moved and blocked later that afternoon.  Not sure how he is able to squeeze us in between these other two boats, but he does with no problems.

Thank Goodness We Are Not This Wide

There was a trimaran that had been in the yard for 25 months!  She had a lot of work done and was finally going back in the water.  The problem was she is too wide to go down the slipway so they have to brining  a 90-ton crane to lift her up and over into the water.  

It was remarkably fast and effecient.  The yard did a tremendous job and truly was due to the expertise of the slipway team with Kevin at the lead.  The crane arrived around 8:30am and was done by 11:30am!

Boat Yard Projects:

We have scheduled a lot of boat projects with the yard, including:

  1. Haul out / Splash
  2. Waterblast
  3. Copper coat bottom (sanding down bottom paint, applying primer & copper coat)
  4. Re-Seal the deck and hull joint around the entire boat
    • In the end, we also resealed the starboard large hatch, both helm seats & stations, both davits, the bimini.
    • We also resealed / caulked the new ceiling panels in all 3 cabins, master bath. Caulked the salon around the new counter tops & around the nav station.
  5. Gelcoat repairs
    • Below the waterline: repaired small osmosis areas, small cracks, dagger boards, and sail drive casings
    • Above the waterline: both hulls had previous repairs that no longer matched the surrounding gelcoat so we blended them better; 2 small areas at starboard bow
    • Sugar scoops: both sugar scoops around cleats, steps, and by waterline
    • Deck: Port bow filled holes from old cleat, cockpit, filled crack on hatch, both entries at sugar scoop filled holes from old barrier (water stop barriers)
    • Inside: a few of our bulk heads had small hairline cracks that we reinforced and re-glassed
  6. Wash, wax, polish
  7. Prop-speed on the props

Outside Contractor Projects: Outside of the boatyard staff:

  1. Canvas: Kim is coming back to give us phifertex side panels for the cockpit enclosure and new phifertex and sauleda window covers for the salon.
  2. Whangarei Marine removed our props and saildrives.  We are replacing the bellows, clamp rings, o-rings, and seals on both saildrives.  Huge . They also sleeved, turned, polished the wear marks on the saildrive shafts and lapped the starboard cone.  An big and expensive job.
  3. Vital Signs is replacing all of our vinyl graphics, stickers, logos on the boat.  
  4. Aakron Express is repairing our EVA/non-skid which came up on the interior floor of our dinghy
  5. RH PRecision is making our new rudder shafts, then we will take them to Alert Anodising to anodise them.
  6. New custom fit rudders are being built.
  7. Denray Marine will service our liferaft and 4 of our PFDs
  8. Nautilus Braids will provide us with new main sheets, spin halyard, reefing line, Oh $hit line (hand hold off bimini), and a roll of dynema
  9. Cleigh Ltd, Matthew Duckett will install a new 220v inverter/charger.

Matt and Christine’s Projects

  1. Remove all vinyl stickers, logos and adhesive (5+ days)
  2. Replace anchor chain markers indicating length (every 10m) and clean 100m of stainless chain (3-5 days_
  3. Install heater port heater
  4. Install 12v Inverter/charger, Matt assisted with wires, breaker, installation
  5. Varnish hand rails along cabin top, flag pole, hand holds in cockpit, helm seats, princess seats, flag pole, bimini rails (all 4 sides), princess seats, and wench handle holder
  6. Clean and polish all interior wood
  7. Polish all stainless
  8. Replace window screens
  9. Repair utensil drawer 
  10. Repair wood along aft bimini (wood glue)
  11. Repair, paint, seal starboard head ceiling (5 panels have chipped paint on fiberglass)
  12. Repair 3 steps on both both sugar scoops (teak work)
  13. Sewing projects (probably won’t get to): new fender covers, new cockpit table cover, new cockpit pockets, new recycle bags, new man over board cover, new outboard cover

As you can see we are doing a LOT of work.  And it is putting my project management skills to the test!  We are hoping to get all of this done within 5 weeks!

Stay tuned for upcoming blog posts on building new rudders, coppercoat (bottom job), vinyl stickers, gel coat repairs, and canvas work.

The cover photo is Sugar Shack after removing her stickers and her bottom paint.  That is our NZ car that we bought last season and are tooling around this season (BMW 330i with 20k miles that we bought for $3850!)  What a deal!  We will sold it for the same price after we splashed back into the water.

Our blog posts run 10-12 weeks behind actual live events.  This blog happened the 2nd week of November 2023.  Did you catch our Christmas in Whangarei blog where I bake over 800 cookies and ring the bell until it upset the Mayor?

On the Hard: Raiatea Carenage

It is that time again – time to haul our beautiful boat out of the water to do some general maintenance and repairs.  It is always nerve racking to pull your boat out of the water, but the team at Raiatea Carenage really take care of you.

We pull into a narrow waterway (which will be expanded this year) with rather large boulders on either side.  Several team members grab our lines and slowly direct us toward the travel trailer.  In addition, there are guys in the water watching our rudders, dagger boards, and props to ensure they play nicely with the boulders.

The Work List:

  • Repair Port Bow (damage from another boat)
  • Repair Port Hull (damage from coral head)
  • Port Rudder Repair (damage from coral head)
  • Re-fix Port Hull side (fix color match from previous work)
  • Sand down all bottom paint to gel coat (22 years of paint)
  • Apply barrier coat (sigmacover 280) and 3 coats of bottom paint (Carboline AF 3000)
  • Apply Peller Clean on sail drives and props
  • Rudders: replace bushings (DIAM 67 JP3)
  • Sail Drives: change oil and replace sealing and O-rings)
  • Drill hole in new anchor shaft
  • Weld/Sauder lifeline
  • Rebed starboard large window (leaks)
  • Rebed deck and hull (about 60% of it replaced)
  • Complete wash and wax of entire boat
  • Spinnaker Repair (taken to Marina Apooiti)

Dominique, the owner, expertly uses a remote control device to maneuver the state-of-the-art trailer.  It is frightening and yet so very impressive to watch them pull Sugar Shack out of the water.

The first thing they do is pressure wash the boat to get all the grime and stow away critters off the bottom.  Then they remove both of our rudders which need repair and service.  The photo shows them removing and installing the rudders.

Next we are placed in our new temporary home.  Dominque is able to squeeze us in right up close and personal to other boats.  Thank goodness we won’t be onboard for the entire stay.

Repairs

The bottom of the port hull needed some extra love.  We had the yard sand down to the gel coat, apply fearing and fiberglass, barrier coat and paint.  Just like new.

The port rudder needed additional love.

While in Huahine, another boat lost control and hit our port bow.  Causing about $3300 worth of damage.  Lucky for us he was insured and covered the cost.  

When we returned, we had lots of beautiful sunsets.  The waterway at Raiatea Carenage.

Our view from the hard at Raiatea Carenage.

Splash Day

The day has come to put Sugar Shack in the water – exactly 1 month from the haul out date!  We are so excited to go back on the water!!!  Dominique is driving or should I say using the play station remote control while 3 guys are in the water and 2 guys are on port waiting for lines.

The team expertly maneuvers Sugar Shack’s wide back side around the many boulders on both sides of the boat.  She slips by without a scratch or bump!  That is how good this team is!

The Team

Dominique is the owner and such a sweet, fabulous man!  Fa’ura is the office manager and she always had a smile for me.

Spinnaker Repaired

We took our spinnaker to be repaired and they did a great job.  She was efficient, reasonably priced, and on time!  We flew her a few days later to see how she looked and we were very pleased.  Sure some of the colors don’t match, but hell she is a 22 year old sail!

We spent a lot more time on the hard than anticipated but it is always better to get the job done correctly rather than quickly.

Dominique at Raiatea Carenage certainly took good care of us. We are so very grateful for his help, patience, and care!

We finally say Toodles to Tahiti in our last blog post.  Events from this blog in April and May, 2022.  Our blog posts run 10-12 weeks behind our adventures.

Boat Projects

We have time on our hands as we wait for a weather window and as we wait for storms/squalls to pass.  So, we fill those gapes with a few boat projects and general maintenance.  Just in case you are wondering, we do work as well as play. 

Jib Roller Furler Pin

There is a rather large shackle that holds the tack of the jib to the furler (very important).  The pin inside the shackle had weaseled its way out and was almost lost.  Thank goodness we caught it.  We had to unfurl the jib to release the pressure from the shackle in order to get the pin back into place.  Once inside, we zip tied it to secure it.  Yes, the bottom shackle is twisted as it is designed to be a 90 degree shackle.  Although, we never did understand why there are two shackles here.

Jib roller furler pin

Jib roller furler pin

Sail Bag

Our sail bag (which holds our main sail) has a panel with “Sugar Shack” stitched on each side.  The letters were starting to come off so we decided to take off the two panels and stitch the letters back on.  A lot easier said than done.  The panels were stitched on to the main sail bag and had an adhesive 2” tape around all four edges.  The stitching was rather easy to cut and remove, but the adhesive was a mess. 

We removed as much of the adhesive as we could (we did not want the sticky stuff on our sewing machine).  Then Matt began the slow process of sewing on each letter.

We had to remove the sail bag in order to sew on the repaired panels..  That is another huge project as we have to secure the main (which weighs in at 300lbs) using the lazy jacks, then remove the sail bag.  The sail bag needs some reinforced stitching and then we can put the panels back on.

About a month later, we had calm weather conditions and began the process of removing the sail bag.  Matt secured our heavy dacron main using the lazy jacks (the lines that hold up the sail bag).  He had to remove the reefing lines and a lot of other stuff to get the sail bag free. I must say hat it looks so naked without the beautiful sail bag!

Matt sewed the sail bag’s weak spots and made a few small repairs before sewing on the two panels.  We laid out the sail bag on the deck in order to properly place the panels.

And she is all repaired.

Washing Machine

Yes, we have a small wash/dry machine on the boat.  It is a 2001 Splendide WDC 1024C.  I have to be honest I love it.  We don’t use the “dry” portion of the machine as it takes too much energy/power to dry the clothes.  The spin cycle is so good that I can hang the clothes in the sun and they will be dry in an hour or two.  Having a washer is a true luxury on the boat. Well, frankly anything beats washing clothes in a bucket!  The only downside to the washer is that I can only run laundry when we have full sun (it takes a lot of power), full water tank (which means running the watermaker), and light wind (to dry the clothes).  It’s a lot to ask of Mother Nature. 

But I can usually do a full load of all our clothes every 2 weeks.  Of course, we do wear our clothes several days in a row (don’t gross out – we live on a boat!).

The Problem

There is a small 110v water pump that evacuates the water from the machine.  It has been on its death bed for about a year and we keep it limping along.  The machine is 21 years old after all.  Matt took it apart 8 months ago and fixed the fan that keeps the pump cool.  Each time I use the machine I test the fan to ensure it works before starting a new load.

However, during my last load, the machine would not evacuate water.  Fiddle sticks!  We had to drain the water into a bucket and out the window, spin the clothes, and then remove them. The machine is bolted onto a 1” piece of wood which can’t be removed.  So, in order to access the back of the machine, we have to unscrew the wood from the cabinet. This after I remove all the cleaning products from the cabinet of Course.

Splendide WDC1024 Washing Machine

Splendide WDC1024 Washing Machine

Matt was able to access and remove the small motor (which by the way is no longer manufactured).  There are two problems.  1) The seal is broken so there is a small leak from the water pump.  We can’t fix this as we would have to destroy the pump to get to the seal and we don’t have a seal replacement. 

The other issue is that the fan is moving side to side and it is not supposed to.  The bracket that holds the bearing in place (which holds the fan in place) rusted and broke (see 2nd image on right). Hmmm.  Well, we can’t get a new bracket or bearing so we improvised. Matt stuck two pieces of pvc behind the bearing to keep it from moving.  This is only a temporary fix!

INSERT 5 COLLAGE OF WATER PUMP

We are working with Splendide to find a used water pump for our machine.  We found several on eBay but none would fit our old machine.  The thought has crossed our mind to buy a new Splendide but all of the new models are too big to fit our small cabinet. Drat!  Just our luck, we find one brand new part at an RV parts store.  We buy it and ship it to Wayne who is visiting soon.  Sweet luck!

Watermaker

Another joy on our boat is our fresh watermaker!  We are so darn lucky to have one onboard so we don’t have to retrieve fresh water from shore in jerry cans.  We have two pumps on our Spectra watermaker, but one of them decided it had enough of us.  Matt tried to repair it and it just won’t have anything to do with us.  Lucky for us, we were able to find a replacement and have it shipped to Wayne  as well. In the meantime, we are only able to produce 50% of the volume so we are running it a lot more than usual.

Windlass 

The windlass raises/lowers our 100m of stainless steel chain and our 60lb stainless anchor.  It is fantastic to have this done with a push of the button as opposed to by hand (can you imagine my biceps if that were the case?).  While we were trying to raise the anchor from an anchorage that was 18m deep, the windlass stopped working.  It would not go up.  Farfignugin!

Matt removed everything from the locker and proceeded to remove the motor.  After an hour, he cleaned everything, switched the up with the down (which was working), and put it back together.  This way we at least can use it to bring up the heavy chain and anchor.  To make it all go down we can do that manually in a controlled free-for-all type process.  Not ideal, but a temporary fix.

Matt realized that it was not the motor that was broken, but the relay.  We don’t have a spare one of these.  So, we get back online, order the part and send it to Wayne. Thank God Wayne is coming!!

Small Boat Projects

Table Runner

I decided we needed a new table runner for our cockpit table.  I found beautiful fabric in Papeete and went to work. Of course, Matt had to complicate (and yet improve) my pattern.  Not bad for a small project.

SUP Cover

The new stand up paddle board is very huge and it has been baking in the sun since we bought it about 2 months ago.  We’ve needed to make a cover for it – and now is the time!  We had some extra white fabric under the master bed that would work.  It is not sunbrella, but it will do for now (at least for the first iteration).  The cover fits snugly with a little extra padding on the tip and the side.  We left the fins on and the part of the board showing for photo purposes only (smiley face).

Other Completed Boat Projects

  • Replaced zincs on port prop
  • Cleaned Propellers
  • Repaired window leaks (port large window, starboard above nav station)
  • Salon Fan (this is dead and needs to be replaced)
  • Repaired freezer door trim

Pending Boat Projects:

A boat is always a work in progress (like a house).  In addition to the washing machine, watermaker, and windlass, here is a list of a few more outstanding boat projects:

  • Lazy Jacks – inspect and tighten
  • Main Sail – repair rub spot (port side stern)
  • Paint Bilge
  • Clean Engines
  • Paint Engines
  • Freezer insulation repair
  • Repair master bedroom leak

Keep in mind, that our beautiful home is over 21 years old and she has been across many oceans.  She is truly in excellent condition for her age and we are continually being praised for her beauty and good condition.  So, even though it looks like a lot is broken, it is just “normal” boat projects.

We spend the New Year celebration in Taravai with an authentic Polynesian BBQ in our  last blog.   Events from this blog post occurred in  January 2022.  Our blog posts run 10-12 weeks behind our adventures.