Yacht insurance is a tricky subject: kind of like politics and religion. But, I am going to share my thoughts and process for renewing our yacht insurance this year.
Please note that this blog is solely my personal opinion and does not reflect the opinion of others. My goal with this particular blog post is to simply shed some light on a rather dark subject that can be very confusing.
This is a really long blog post because I could not justify writing more than one blog post on this subject.
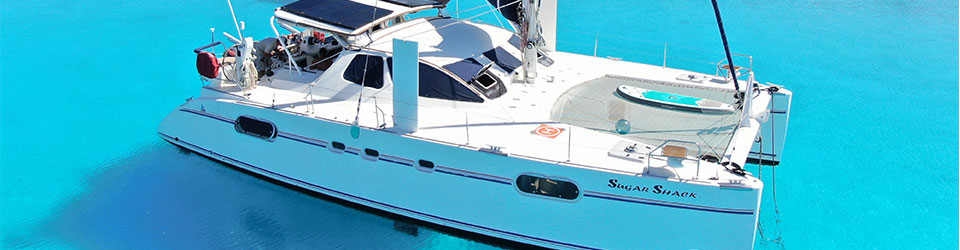
I interjected pretty photos of Sugar Shack to simply to lighten the mood and add some color to a rather boring post.
Self-Insured
Many boats decide to be self insured (or uninsured). This is perfectly fine for them but is not something we ever wanted to pursue.
Some cruisers save the premium each year and plan to apply that savings to any future incident. Which theoretically would work if you do not have a significant claim or a catastrophic loss.
Other cruisers just take the risk and never have a problem.
Personal opinions on yacht insurance vary greatly from “insurance companies being scams and rip off artists” to “financial ruin” to “saving grace.” We are probably somewhere in between but still believe it is in our personal best interest to have yacht insurance.
Our Insurance Claim
Sugar Shack suffered a very large claim due to a lightning strike in 2017 while anchored in Costa Rica. Let me state that it was not lightning season and we were not in a lightning prone zone. We were in a country that did not offer Yacht in Transit (duty free purchases). In addition, there was only one service provider who had the expertise to do the work and their rates were equal to Miami rates (exuberantly high). These two things increased our claim significantly. Had we been able to move the boat to Panama we could have easily saved 30%.
At the time, we were told the claim would remain on our “record” for a maximum of 7 years. However, applications ask if we’ve had a claim in the past 10 years. Why does this matter? Because it gives some carriers the ability to deny us and or raise the rates.

South Bay at Slipper Island
Our Annual Process
So, each year, we “bid” out our yacht insurance with a variety of brokers. Our current broker is not very customer-centric, does not reply promptly to emails, is vague in responses, and tends to speak in non-laymen terms.
This year we decided to change brokers even if we stayed with the same insurance carrier.
Most brokers have a set of yacht insurance carriers they work with so you cannot go to one broker and get quotes from all carriers.
When selecting a broker make sure:
- Your broker is on your side and works for you.
- Your broker is involved in any claims and negotiates with insurers through every aspect of a claim.
- Your broker helps you obtain the best insurance policy for your cruising lifestyle, float plan, and yacht.
- Your broker explains every aspect of the policy that is confusing, vague, or duplicative. If they don’t know the answer, they should get clarity, in writing from the carrier.
So, this year, I contacted 8 brokers.
- 2 brokers could not insure foreign vessels
- They were in NZ and AU and could only insure NZ or AU yachts
- 3 brokers never responded
- 3 brokers requested additional information and completed applications
Of the 3 that responded, only 2 provided quotes. Both brokers offered way better customer service support than our current broker (which was refreshing). Both brokers answered my multitude of questions and seemed eager to work with us.
Our Requirements
I have a full list of requirements that I send out when bidding yacht insurance. Send us an email or comment below if you are interested in receiving this list. These are the key elements:
- Stated Value (no depreciation)
- Most carriers want to depreciate the boat, but since our boat is 25 years old, depreciation does not properly reflect its current value
- Stated amount for our tender and outboard
- Coverage for lightning, cyclones, named/numbered storms, salvage, pollution, towing, uninsured boaters, personal property, theft/robbery, and medical
- Third party liability coverage in various amounts: In NZ $3m USD, in AU $7.1m USD, in New Cal $1m USD. The different amounts reflect each country’s marina requirements.
- (2) Crew
- Most insurers want 3 or more
- U.S. Flagged boat with (2) Americans
- Problematic as many carriers do not insure U.S. boats
- We have lithium batteries and a carbon mast which can be challenging to insure.
Our last survey was Feb. 2026 and our last rigging survey was Sept. 2025. So, we had recent documentation to prove the value of our boat.
Applying
Each application is different and requires a lot of information. They usually run between 6-11 pages in length and require additional attachments. Including:
- Completed Application
- Recent Survey (both boat and rigging surveys)
- Sailing Resume with noted certifications and licenses
- Sailing Log and history of nautical miles traveled
- Sail Plan for policy Period
- Cyclone (named/numbered storm) plan
- Boat Registration
- Current Binder (1 broker asked for this)
Once all of the above information has been submitted to the carrier they provide a quote and a “sample” policy.
Then the fun begins. Comparing the policies to my current policy.

Little Whaler Bay at Mercury Island
Insurer Options
There are a variety of insurers. Some are rated and have financial backing while others are not. Some only insure “high-risk” yachts while others do not.
Option 1
One broker presented us with ION Marine Insurance. This company has been around for 10 years but it is not rated, and did not have a great online presence or reviews.
The policy language is heavily restrictive, can be vague, and seems better suited for U.S. pleasure crafts. Most brokers use this as a “last resort” insurer.
ION insurance met most of our basic requirements except Third Party Liability.
ION could not meet our different Third Party Liability coverage options (only offered $1m USD) so we would have to get excess coverage at a higher rate.
They did not offer the ancillary options listed with Global Yacht. No coverage for salvage, pollution, medical, piracy, etc…
The broker placed us with ION because our claim in 2017 was considered “big” and put us in the “high risk” category.
The benefit with ION is the deductible for damage caused by a cyclone, named or numbered storm was only 4% of the boat value.
However, the policy seems better suited for U.S. coastal sailing, marina-based vessels and yachts making shorter voyages.
My biggest concern is that ION is a higher risk with no financial backing and create lots of doubt on whether or not they will actually pay out a claim (they do have good online reviews).
This company does not have a strong claims handling structure or established claim procedures being that it is fairly young company.
In addition, ION has a “pre-dispute clause meaning you cannot immediately “sue” you have to enter arbitration first.
Option 2
Another broker offered us Great Lakes (Global Yacht) coverage which was our insurer 9 years ago. We dropped them after our claim because of the poor way their claims adjusting firm handled our claim. With that said, despite the 7 months of arguing, they did pay a significant portion of our claim (about 85%).
They are AA rated, have a very strong financial backing, have been around for decades.
The policy offers broader liability coverage and is more commonly used for international yachts. The company has a strong claims handling structure, a large claim capacity with experienced marine adjusters, and established claim procedures.
In addition, they offered the following added benefits
- Single handed sailing for up to 36 hours
- Coverage for salvage, pollution, towing, grounding inspection, medical, personal accident, repatriation/accommodation, piracy, obstruction removal, and full Third party liability cover in all 3 countries we are visiting.
Great Lakes offers stronger liability protection, more cruising specific benefits, better international yacht structure and is designed for offshore sailing.
The downside of Great Lakes:
- The deductible for mast claims and lightning is a flat $50k USD (almost 10% of the hull value)
- The deductible for a cyclone, named/numbered storm is 20% of the claim or 2% of the hull value (so minimum of $10kUSD).
- All of our other policies only had a 10% deductible. A 20% deductible is very high!
- New for old deduction for sails and rigging (up to 1/3)
- No coverage for phones, drones, jewelry, cash, collectables
- Depreciation for personal effects (computers, laptops, iPads, etc…) and after 3 years no cover for these items
- If a war broke out between any two or more of the following countries: United Kingdom, United States of America, France, The Russian Federation, the People’s Republic of China – then all polices, worldwide, will be cancelled. Scary considering our current US president is starting wars in multiple countries.

Great Barrier Island
Comparing the two Insurance Carriers
Please comment below or contact us for a full comparison of the two carriers. I dumped both policies into ChatGPT and asked for a full assessment, pros and cons of both polices.
ChatGPT determined that Great Lakes was a much better fit for our cruising plans.
Options
We decided to ask our broker to inquire about two things.
- Can we increase our premium in order to decrease the 20% deductible for cyclone/named/numbered storm.
- The answer was “no” the deductible is the deductible.
- Is the 20% cyclone/named/numbered storm applied in all geographic areas or only outside the zone. If we were in the safe zone and a numbered storm damaged the boat, would we be required to pay the 20% deductible or would it be the standard 4% deductible?
- The answer was the deductible is applied everywhere, inside or outside the zone. However, if the boat is not in the “warrantied area during cyclone season” they (and all companies) can deny all claims
Bottom Line:
We decided to go with Great Lakes (Global Yacht) coverage.
Kind of “The devil you know.” They offer better coverage, more flexible policy wording, strong claims handling, and are geared toward international vessels.
Claim Preparedness
Because we suffered a claim, we are better prepared to deal with any future claims.
Contact us if you are interested in receiving our “Preventing and Mitigating Claim Issues” document.
Here are a few key things every boater should do and have:
- A complete equipment inventory list which should include make, model, type, serial number, year purchased, purchase price, location on vessel, and details.
- A complete upgrade list for the past 5-7 years including: the same information above
- A complete maintenance list including action taken, date, details of repair or maintenance including specifics of work.
- Photos and/or videos. Especially of tender, locks, security, etc..
6 Hidden Clauses in Yacht Insurance
- Seaworthiness Clause: Almost all policies state this which can be challenging as the insurer can argue the boat was not “seaworthy” because of something unrelated to the accident. Important to keep maintenance records and track major repairs. Photograph items when possible
- Navigation Limits: The navigation limits are set on the binder and should be updated if the float plan changes. Always check lat/long boundaries and request written approval for new destinations.
- Named/Numbered Storm/Cyclone Deductibles: the typical deductible is 5-10% of the hull value. So, the first dollar paid is by the yacht owner up to the deductible. Great Lakes has a separate deductible for storms and cyclones whereas ION is one deductible.
- Unattended Vessel most insurers want to be notified in advance when the vessel will be unattended (i.e.: if we fly back to the states for 2 weeks). Some carriers have set limits (the yacht cannot be left for more than 24 hours or 72 hours). Know the limits, submit a guardianage plan to the carrier. Contact us if you want to see a sample plan.
- Gradual Damage vs Sudden Accident: insurance only covers sudden accidental damage. It does not cover corrosion, osmosis, rot, wear/tear, or slow leaks. So, if a thru hull slowly corrodes and fails, the claim can be denied. It is important to inspect critical components regularly and replace aging thru-hulls and hoses.
- Lightning Strike & Mast Deductibles: some carries offer a separate deductible for lightning strikes. For example, Great Lakes states a flat $50k deductible.
We were shopping for new yacht insurance in March 2026.
Please come back for more fun and adventure in New Zealand. Promise no more boring yacht insurance blog posts.