
Sugar Shack has had a string of failures over the last few weeks. I cannot remember a time when I’ve been so frustrated.
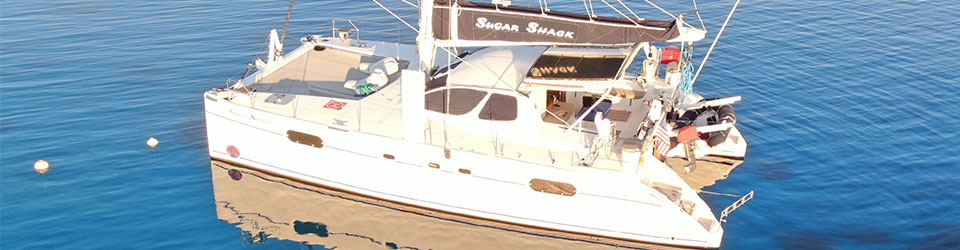
Our boat has been and continues to be an amazing vessel.
She has safely transported us over 50,000nm across both the Atlantic and Pacific Oceans. She is our home, our yacht, our love and I would not trade her for anything else. We love our Catana!
However, with anything over 24 years old you have failures.
All of this happened over the course of 2 weeks in route to Fiji from the Marshall Islands.
Double Steering Failure
As you might recall, we had a “A Double Steering Failure” when we lost our starboard steering gear box and our port rudder arm. This rendered our starboard helm un-steerable and our port helm without a rudder.
Makes steering a challenge, but still doable with auto pilot using the port steering gear box and the starboard rudder.
Problem: Starboard Steering Gear Box failed.
Solution: We ordered new bearings and seals from Germany for both port and starboard. They’re being sent to Fiji where we will do repairs.
Problem: Port Rudder Arm failed.
Solution: The good news is it broke at the attachment point. We found the one man who has the tools to weld stainless and he fixed our rudder arm! We need to weld the two pieces together at the exact correct length to reinstall the rudder arm.

Matt and I searched for a stainless welder all over Funafuti over 3 days. We finally found the one man who has the tools and expertise. He tack welded the two pieces together, then did some grinding, then finished the welding. We are back in business with two rudders!

A Massive Disappointment
Port Engine Failure
Problem: Our port engine water pump had a slow leak. We had been watching it and were prepared to replace it once we got to Fiji. However, the leak got progressively worse. So, Matt decided to replace it in Tuvalu.
The water pump is located in front of the engine making it a challenge to access. Matt has to lean over the engine, upside down to access the pump. Many pieces and parts have to be removed including the timing belt.
Problem #2: As Matt was removing the timing belt it ripped! Oh for the love of God! The engine can’t run at all without a timing belt! This is bad, very bad!
Solution: The water pump was installed, but there is nothing we can do about the timing belt. We ordered (2) new timing belts (one for both engines) from the UK to be delivered to Fiji where we will do repairs.

More Annoying Issues
Problem: As Matt was removing pieces from the engine to get to the water pump one of his most used sockets fell into the water. We are in 14m depth (40′).
We got the dive gear out and both pressure gauges had water ingress and were not readable.

Solution: Matt used the dive gear anyway and within 4 minutes found the socket! Yeah.
Problem: The furler is starting to fail and is leaking. It is still working, but we have to be gentle when using the genoa.
Solution: We ordered new bearings and seals to be sent to Fiji where we will do repairs.
Problem: The washdown pump failed. We use this pump to hose off the boat and clean the ground tackle (with both fresh and salt water).
Solution: Matt thought we could just take it a part, clean it and get it working. But this 13 year old pump was done. We will have to buy a new one.

Summary
- We can steer from the Port helm and run back to starboard to use the throttles
- We found a stainless welder in Tuvalu (the 2nd smallest country in the world). We now have use of both rudders
- The port engine NEW water pump is installed
- The engine was off when the timing belt failed.
- Would have been catastrophic if it failed with the engine on.
- We found the socket in 14m of silty water. New octopi will be purchased in the future
- Matt thinks he can take the washdown pump apart, clean it, service it and get it working without a replacement.
- The furler still works but we have to be gentle using it.
Trying our best to see the silver lining. We are truly blessed and know that “life happens.” It’s just hard when it happens all at one time.
We find some joy and charm in Tuvalu – check out our last blog post.
Our blog posts run 8-10 weeks behind actual events. The failures occurred between mid to end of March 2025.


