A Sticky Situation: Vinyl

Last season we decided to change the color scheme of our boat from blue with red accents to gray.  A more modern and sleek color.  We converted a few things with the purchase of new canvas (sail bag, cockpit enclosure, dinghy chaps, cushions), and sails but we had to tackle the vinyl stickers.  We have loads of stickers on the boat.  Our “Sugar Shack” logo is on each bow and the port stern, our home port is on the starboard stern, Catana has 3 logos and we have 3 stripes that run along the 47′ of both the inside and outside of each hull.

It all had to come off!  We hired Vital Signs to recreate our new graphics.  Wayne came to visit us immediately after we were hauled out.  He showed us how to properly remove the stickers and adhesive.  Of course he made it look easy with the right tools.

Then Matt and I jump into the process.  It is a very painstaking process that requires tons of patience (which I have none), finger nails (gone), and proper tools (nope don’t have these either).  The first photo shows several of the vinyl stickers (Sugar Shack, red line, blue line, world, and boot strap blue line).  I use a small exacto knife blade to get under the 23 year old baked on stickers.

We use every method at our disposal, climbing ladders and platforms, hanging upside down, and sitting cross ways.

It was so sad to depersonalize our boat…

Then Came the Hard Part

As if getting the actual old vinyl stickers off the boat wasn’t difficult enough you had to go back and remove every spec of the adhesive!

This tested every bit of patience in my body!

The top photo shows the left over adhesive after the sticker stripe was removed.   But even if you cannot feel the adhesive on the boat it still remains!  Check out the bottom photo where you can barely see a light discoloration indicating residue.

Patience, loads of turpentine, lots of exacto blades later proved more successful.

After 5 days of scraping, moaning, and complaining, the boat is ready to be “cut” (or washed with an abrasive product) which will prepare the hull for polish and will remove any remaining adhesive.

The Design

We decided to make some changes to our vinyl graphics.  Instead of a small red stripe above the windows and a large blue stripe at the window line we are going to replace them both with just one larger gray stripe.  Instead of a large blue stripe and a small red one at the waterline we will replace them with one large gray stripe.  We will then replace the small “Catana World” logo with a logo Matt designed.

Because we have “Sugar Shack” on the stack pack (sail bag) and we have it on the stern we decided we did not need a huge logo at the top of the bows.  So, we incorporated it into the world which now represents more of the Pacific and the areas where we have sailed.

We head to Wayne’s office where he shows us a mock up of our design.  Now…you have to use your creative “eyes” as he takes an old photo with the old vinyl and overlays the new.  You can tell this is an old photo (maybe 3-4 years) as the bottom paint is red and the sail bag is blue.  Now our sailbag is gray and the bottom paint is black.

The Application

Wayne returns for 1.5 days to adhere all of our graphics.  We decided on 3m slate gray to match our canvas.  He is meticulous, effecient, and proficient.  I am shocked at how fast he is able to adhere all the stripes around everything.  

We especially love the black hole at the bow 🙂  The world is made up of 3 stickers.  The background, gray, then the white letters, then the black outlines around the letters. But the hole as is was pretty fun to see.

This is a fun photo which shows you the new stickers, the removal, and the old stickers on the back of each sugar scoop.

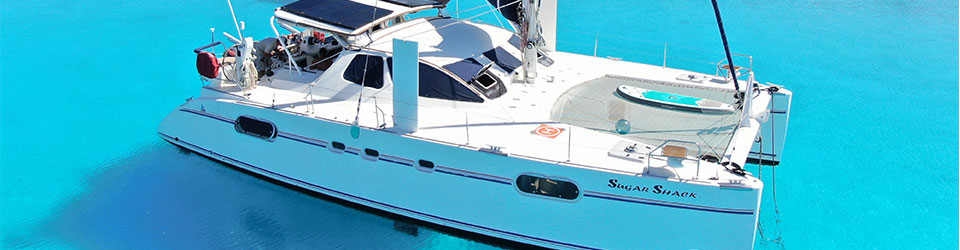
The before and after photos are remarkable. It immediately lifts our spirits to see our name back on our home.

We are so pleased with Wayne’s work.  We would highly recommend Vital Signs for all of your graphic needs.  They did an excellent job for a very reasonable price.  They are located in Whangarei, New Zealand.

Our blog posts run 10-12 weeks behind actual live events.  This blog post happened during the month of November.  We enjoy some Kiwi fun at a cabaret in our last blog post!

Kiwi Fun

It is difficult to live and work on the boat while she is on the hard in the boat yard.  We wake up and start working right away (0700) and then work until the sun goes down (2000).  We work on the weekends on projects that don’t get in the way of the contractors.  Work work work.  So, we periodically have to blow off some steam with a little Kiwi fun.

The Seaside Sirens

There was a flyer on the bulletin board outside the boat yard office that caught my eye. It was an advertisement for a one night only show of the Seaside Sirens.  Intrigued I googled it and to my surrpise it was a cabaret.  Oh ya, sign me up for this type of Kiwi fun!  I called a few friends and dragged them along with us.

We stopped by the Quay for a cocktail prior to the show.  Daniela, Mirko (on Yum Yum) and Kara joined Matt and I.  Check out my pretty drink (lower left) called the Autumn Sun.

The Seaside Sirens are mer people and the two sailors have been caught under their spell to do their bidding.  The live band called “The Otherlies” were land based but worked with the mer people in exchange for favors.

And then the show began!  It is not a strip show per se, but they do strip down to pasties.  They had performers dancing, singing, performing on a pole, silks, large ring, and with a hula hoop.

It was serious fun with great laughs and loads of entertainment.  The performers were lovely and put on a great show!

It ended at 8:30pm and we were all starving.  We stopped by several eateries which were open but their kitchens were closed.  Finally we found Loco, a Mexican place that fed us and wrapped up our night.  Kiwi’s know how to put on a good show but they need their restaurants to stay open past 8:30pm!

Welcome Cruiser Party

Whangarei throws an amazing party each year to welcome the new cruisers to Whangarei, NZ!  This year I had the pleasure of assisting (albeit very little) Kara from Town Basin Marina.  The party was held at Aqua Restaurant located at the Hundertwasser Museum.  It was great fun seeing old and new cruiser friends.  Upper left is Kara and I and upper right are two of the amazing performers.

The most spectacular Maori group, Hatea Kapa Haka Group  performed and they did not disappoint!  They take my breath away, brought me to tears with a Maori version of Ava Maria and showcased their local traditions and songs.  It was spectacular.

Christmas Tree Farm

It was nearing Christmas and our friend Kara from Town Basin Marina asked us to come along to get her Christmas tree.  We went to an actual Christmas Tree farm called “Crane Road Christmas Trees.”   The family had a beautiful ranch style home overlooking their gorgeous farm!

Oh how I wish I could have brought home a tree to the boat!  But even though they were “small” in American standards (between 4-6′) they were way too big for our boat.  But they smelled devine and they keep all of their trees in buckets full of water.  

Kara found a beautiful, round tree that we gently stuffed into her car and brought to her house.  She did a fabulous job decorating!

After our tree farm we went to Parua Tavern for a tasty lunch!  Check out this super fun mailbox.

Me having a little fun with a NZ phone booth in Whangarei.  I don’t know how to actually make a call from this phone.

I purchased a wooden vase in Panama for cheap and have been using it on the boat on the rare occasions I get flowers.  It has cracked in several places so I commissioned a new vase out of Rewarewa wood (native NZ tree) and it came out beautiful (the darker vase).

Our blog posts run 10-12 weeks behind actual live events.  This show was 22 November.  Our last blog post documented our rudder rebuild, did you read it?

Rudder Rebuild: The Rudder Part II

In Part I of our Rudder Rebuild 1, we walk you through the steps we took to custom design our new rudder posts.  Now we are ready to custom design each rudder blade.  The shafts had to be completed before we began the design process on the blades. 

Both of our rudders were removed immediately after being hauled out.  We were on the trailer and still dripping with water, but they had to come out now while we could raise the boat high enough to get them out of their casings. 

It is pretty clear that the temporary rudder and our standard one are very different shapes, but the surface measurement is about the same.  The borrowed rudder came off a bigger Catana 50, same manufacturer but very different blades.

The one on the left was borrowed from Norsand and the one on the right is our original 23 year old rudder.

Rudder Casing  is Compromised

After we removed the rudders we stuck our heads below the hole and looked up with a flash light.  To our horror we found a few issues with the rudder casing.  One there is a slight crack at the entrance and two there is a bump inside that was rubbing on the rudder post.  Lucky for us, both are fairly easy repairs.

Peter, the expert glassman and rudder specialist, comes over to help us remove the bearing and do the repairs. The bearing proved to be a bit of a challenge as it did not want to come out.  They get a massive sledge hammer and attack it from the top and bottom.  Once it is out, we sand down the blister, fill and paint it before installing the new bearing and case.  It all sounds simple enough but it took them several hours to complete this project.

As you can see the bearing case (lower two photos) was in need of replacement and lucky for us we had a spare on board.  Evidently, it was not considered “horrible” and still functional but we replaced it anyway.

Getting Started on the Rudders

We hand over our old rudder and the two new shafts.  The foam is cut and patterned to fit our new shafts and tines.  As you can see, the rudder posts and tines support the blade a lot better than our original ones which stopped before the center of the rudder.  Weights are put on the foam to ensure it all sticks together.

We are not on site to watch the exact process so I may be missing steps.  Once the foam is sealed and molded they apply fiber glass.  The rudder on the left is done and the one on the right is in process.

Norsand Takes Over 

Once the fiberglass work is done, they are sanded down.  Then we make the executive decision to apply the Hemple barrier coat instead of the Interprotect barrier coat.  Why did we use a different barrier coat on the rudders than on the bottom of the boat?  The primary reason was we didn’t want to wait 2 weeks for the Interprotect to off gas.  So we used Hemple and dealt with the difficult application process.

The Hemple barrier coat was having a hard time curing which meant they could not sand the peaks and valleys.  We were delayed by 5 days waiting for the paint to cure, sand, tweak, sand, tweak and sand again before the rudders were handed back to us to have Norsand apply the coppercoat.

Norsand quickly covers the rudders in coppercoat repeating the same process as on the bottom paint

Once the coppercoat is dry, they sand the rudders to activate the coppercoat.  Then it is time to fit them.

Does the Shoe Fit?

Must admit that there is a little anxiety about the rudders fitting properly.  We were confident the builder knew what he was doing and did it perfectly, but there is a little niggle in the back of our minds.  We knew they were made much stronger and safer than our previously rudders that were factory made and lasted 23 years.  But it is hard to relax until they are fitted.

The yard has to raise us on the trailer in order for us to be high enough to insert the rudders into their shaft/casing.

Peter, Tony and Kevin are on hand to help us install the rudders.  Matt is inside the engine compartment inserting the bolt (bottom right photos) while Peter and Tony insert the shaft.  It is a perfect fit on port.

Starboard needs a little bigger spacer which we can easily make with help from Rob at RH Precision.  What a relief to have two stronger, well crafted rudders back on the boat!

Our blog posts run 10-12 weeks behind actual live events.  This blog posts occured during over 2 weeks in November.  Did you see how we custom designed our rudder posts in part I?