Were you wondering what Matt and I do while the Norsand boatyard crew was working hard on our repairs? Well, you know we can’t just be idle so we finished up a few more boat projects which honestly seems like an endless list.
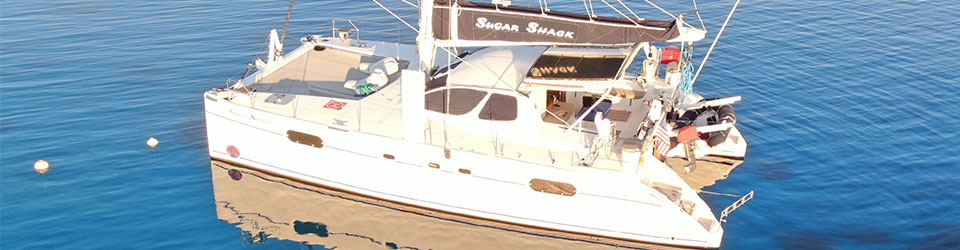
The cover photo is Sugar Shack at Norsand Boatyard. Photo courtesy of Yum Yum who took it as they passed by heading up river.
Boatyard Boat Projects on the List
- Replace Dinghy non-skid (under warranty, Aakron Express to repair)
- Repair Anchor Chain Caddy
- Replace (2) anchor chain rollers and several bolts at caddy (RH Precision)
- Repair genoa North sail (random strings showing)
- Re-Certify Life raft and (4) PFDs (Personal Floatation Device)
- Clean and polish exterior stainless steel
- Apply anti-foul to old/spare rudder and stow in forward bow
- Get the Bauer Dive Compressor Working
- Install bathroom accessories (see next blog post “Final Touches on Sugar Shack”
- Installed a MeLE Mini PC
- Service, Test, and Fill Propane Tank
Repairing the Non-Skid on Sweetie
The non-skid came off the floor, again, so we reached out to Aakron Express / Highfield to come out and fix it, again. Luckily they were pretty responsive and willing to do the repairs. I am glad this is not one of my boat projects (lots of glue/adhesive removal).

Last time they just pulled up the pieces that were coming lose and reglued them. And surprise, surprise, they did not stick and came unglued again. So, this time they completely removed all of the non-skid pieces, cleaned the bottom flooring and adhered new non-skid. Let’s hope this sticks better.
I’m trying not to be annoyed that they did not replace the non-skid on the step. As you can see it is still a little dirty which I can live with but it is a different color! Ugh!

Bow Rollers for Anchor Chain
We took in two of our 5 bow rollers to RH Precision with the hopes of having new ones fabricated. Rob, is truly the coolest dude ever! He put in the specs into his CNC machine (bottom left) and showed us how they will look (purple lines). As you can see, the bolts are way overdue for replacement so we replaced those as well. The black will be our new roller (top left).
Rob surprised Matt by allowing him to come into the shop to assist in fabricating the rollers ! He showed him how to program the machine, figure out the math and then hit “go.” Matt was thrilled which was so darn cute to see.

While the anchor chain caddy was taken apart, Matt decided to fix a few more things. He added strong plastic to the inside panels which were indented from the chain, and he added chivs/spacers to prevent the bolts from rattling.

North Sail Genoa Repair
Our brand new North Sail Genoa had a few random strings (top right photo below) that worried us and it was not furling properly. Roger from North Sails came by and collected it and we all took it to the large North Sail Loft in Auckland for repairs.
You can see how wrinkled the sail is when it is unfurled and it shouldn’t be that way (top left). Guy at North Sails showed us what the 3Di fabric looks like when it comes apart (middle photo with black fabric and white strings) and that does not look like ours so they are “not concerned” with the random string we found.

The North sails engineers added more foam guides at the luff to help it roll better. However, we discovered another potential problem with our forestay. There were black marks on the luff of the genoa which usually indicates something is amiss with the forestay. So, we bring in a rigger…more to come on this in an upcoming blog titled “Fine Tuning the Rig.”

Liferaft and PFDs
Our Viking Liferaft was due for service (every 3 years) so we took it to Denray Marine. They inflated it, checked all seams and connection points, replaced the canister, and added some emergency supplies. I know it looks like the liferaft is locked down, but it can easily be deployed with a single push of a button.
We also serviced 3 of our PFD’s and bought Matt a new one.

Cleaning up the Stainless
We have lots and lots of stainless on the boat. It is one of my many jobs to keep it shiny and clean. So, every 3 months I use super toxic chemicals such as Opsho, CLR, or Grunt to clean up the stainless. However, our friends at Absolute Stainless turned me on to Chemico Paste Cleaner for our stainless counter tops. I thought I’d give it a try on our stainless exterior pieces and HOLY COW it worked amazing! This will make this particular boat project a lot easier in the future.
We have stainless stanchions, turn buckles, line guards, pad eyes, and railings. Each piece has to be meticulously cleaned and polished. Most of the stainless just looks like it has a brown stain or spots which drives me crazy. It’s hard to see in the sun, but trust me it looks bad.
The gates (upper left) get so corroded that they don’t easily open (this is after 3 months).

The pad eyes seem to get the worst corrosion, but they clean up nicely.
Spare Rudder
As you might recall, we replaced both of our rudders in November 2023 (as we lost one rudder). We decided to keep the other “old” rudder as a spare (just in case), but it needed to be painted with anti-foul. Matt sanded it down and I applied 4 coats of anti-foul paint so she is ready to go back into storage.
The spare rudder will be stowed in our forward port bow locked. We stow a lot of stuff in here including: 15 fenders, 2 SUPs, passerelle, 2 folding chairs, 8 PFDs (personal flotation vests), 2 inflatable animals, SUP pump, ladder, and now a spare rudder.

Bauer Dive Compressor
Matt and I love to dive. However, we have not had a dive compressor onboard to re-fill our dive tanks. So, we either have had to find a local company or a friendly cruiser to fill our tanks or we just didn’t go diving (which was always a shame).
We were able to buy a used Bauer Jr. Dive Compressor a few months ago despite the fact that we knew it would be a challenge to get it started.
The Bauer Jr. requires a lot of power to start up. We purchased a soft start (an electrical device designed to gradually and smoothly control the starting and stopping of a compressor motor) to aid our Mastervolt inverter/charger (MASS COMBI 12/3000W-160A 220v) and our Honda EU20i portable generator. Unfortunately, this did not start the dive compressor.
We did verify that it started by plugging it into shore power. So that is good news. We talked at length to Mastervolt, the dive shop that sold us the soft start, and our electrician and they all said it should work – but it did not.
So, we purchased a new Honda EU32i portable Generator and a parallel cable. Using the inverter/charger, the two generators, and the soft start the compressor finally started! Yeah. But we really did not want to have 2 Honda generators onboard – (imagine me smacking my face)!

Small Projects
As you might recall, we sort of blew up our Mastervolt inverter charger when we tried to start our “new to us” Bauer Jr. II dive compressor. The good news, it was still under warranty as it was only a few months old! So, Matt installed this new baby to give us 220 power!

We also finally received our brand new ITSEC 175m2 parasail. I am so excited about this sail! I cannot wait to fly her! We love our new ISTEC Parasail (175m2) – she is gorgeous!

Bathroom Accessories
We also worked on our new bathroom accessory upgrades which are coming up in the next blog post titled “Final Touches on Sugar Shack.” They are the prettiest toilets on the sea!
Programming
We use Synology Diskstation for a number of things including storage of our files, movies, books, and music. But it is also used to monitor our electronics and run our music. The problem is that Diskstation can be a bit of a power hog running at 3+ amps per hour. When you are plugged into shore power or at a home it is not a big deal. However, when you are making your own electricity and you have other power hungry sources, 3 amps can be huge.
So, Matt decided to try out a MeLE Mini-PC which is no bigger than a deck of cards. It has no monitor and no keyboard. But that is not a problem as we already have those. It took Matt several days to program it, but it is working like a charm and only draws 1amp per hour! Big Win.
The mini-PC will not be on the navigation table with all of those wires. The photo was taken as Matt was programming it. It will go below the nav station with diskstation.

Propane Tank
We have several propane tanks on the boat, for cooking and for the bbq. Our main propane tank is aluminum. These tanks are supposed to be tested every 10 years but it is often difficult to find a place that will test them. We had been filling this tank at El Gas for two seasons and they never said anything, until this time. He refused to fill it until we got it tested at Firewatch. it did not take long, but it did cost is $120NZ (we got a new valve as well). The problem was she accidently stamped the tank as a 10lb instead of 20lb. We did not realize it until we took it to El Gas and he had us take it back. So she hammered out the incorrect info and restamped it. Gesh what a pain.

There are two large boat projects that will get their own blog: Caulking the Sugar Scoop Teaks and Caulking the Sugar Scoop Teak.
As you can see we made the most of this haul out in the boatyard. We completed a few more boat projects and are feeling good about our NZ departure. We were anxious to get back in the water as we prepare to head to a new country, Vanuatu.
Best Seat in the House
We got the best spot in the yard! We were parked right by the river on the corner which gave us great views and a beautiful breeze. The top photo is out our bedroom cabin window at dawn and the bottom is a shot from the bow. It is not terrible to do boat projects when you have this view.

Our blog posts run several weeks behind actual live events. This blog post on boat projects occurred April-May 2024. In our last blog post we show you how to repair your teak deck – did you catch it?
Like this:
Like Loading...