
A boat, like a house, is a constant work in progress. There is always something to do, to clean, to repair, or to replace. Confinement provides us with an excellent opportunity to focus on some of the much-needed boat projects that needed to be done.
Some of our boat projects are just “nice to have” done projects. For example, we want to replace our rain shades with bigger rain shades to keep our cockpit drier during storms. We made rain shades a few years ago and they are “fine” but they could be better, more efficient, easier to install, and cover more area.
Another “nice to have” project is making a seat cushion for the transom area of the cockpit (around the wenches and above the line holders). People inevitably sit on the hard fiberglass area even though we have three large cushion seating areas. So, why fight it? We’ve been talking about making a seat cushion here for years but the concern is where to stow the cushions while we are underway…since we would need to access the lines.

But those projects will have to wait until we get through our priority boat projects.
Necessary Boat Projects
Where to start? There are so many. We start with some of the older boat projects. One of the great things about a catamaran is that you have two of everything. One of the bad things about a catamaran is that you have two of everything.
The sunbrella cushion covers on both helm seats had weakened and ripped. We needed to replace the covers which is easier said then done. The covers are made to fit snugly over the waterproof material and cushion. Supposedly to prevent the cushions from retaining water. Which doesn’t always work when you are in a massive storm.
Matt dutifully removed the sunbrella fabric and then painstakingly removed the stitching so he could replace the top panel. Our cushions were made in Turkey in 2010 and were well made. They had double stitching around all the seams. Which is great, until you have to remove all the stitching.
The bottom left photo shows you what the cover looked like. Doesn’t look too bad until you look at the top left photo which shows you how worn out it really was. The bottom right shows you the finished cushion cover.

Annoyingly, we discovered several weeks after installing our new helm seat cushions, that when it rains, the fabric actually shows are two different colors. So don’t look when it rains 🙂

Helm Wheel Covers
I started working on the helm wheel leather covers while Matt was working on both helm seat covers. We had covered our wheels at the helm station with leather to prevent them from slipping in our hands during storms and to make it more comfortable while at the helm. But the leather had turned green (it was tan) from mildew and old age. It had ripped in some sections and generally needed to be replaced. Another “easier said than done” boat project. You see there are 120 stitches between each rung and there are 5 rungs (600 for those of you mathematically challenged) times to wheels. That’s a lot of stitches!
Removal:
First: remove the two turks head knots that mark the center of the wheel. You can either cut the string or try to find the end that is neatly tucked under the knot. I was able to find the ends of 3 of the 4 knots and saved the line. But the 4th one had to be cut. (see two top images)
Next, the stitches had to be removed. Originally, I thought I would just cut the line. But it was a particularly windy day and I did not want pieces of this sticky string to go in the water. So, I literally pulled the line through each stitch to remove it. (bottom left image).
The old leather (green used to be tan) next to the new leather (gray) in the lower right photo.
Next the wheel needed to be cleaned. There was double sticky tape holding the leather in place and rust, and gunk all over the wheel. Nothing that a brillo pad, cleaning agent, and elbow grease couldn’t handle.
Port Helm

Port Helm
Starboard Helm

Starboard Helm
We measured, re-measured, and then measured again. Once we cut this leather there is no going back! After we cut it, I sewed the two end pieces together, applied my double sticky tape to hold the leather cover to the wheel and started stitching. It took me about 30-45 minutes per rung, times 5 rungs, x 2 wheels. Needless to say, it took me several days to finish both sides.

In case you are wondering, we purchased our leather helm covers from Edsonmarine. They are pricey, but they work wonders!
Next Matt recreated the two turks head knots on each helm. These help us realize where “center” is which is crazy important wile underway. Sometimes, you are looking at the sails or the mark or the channel and can’t look at the wheel. So, it is important to be able to “feel” the knots to know your wheel is centered.

Interior Table Cleaning
We have a beautiful table inside the cabin that folds open to make an even larger table (double the size). We try to maintain it and keep it clean, but daily use, oils from hands and cleaners and what not create build up. The outer edge, or darker wood gets the brunt of it. It was way overdue for some loving. We take a very gentle approach as we don’t want to scratch the wood. Using a metal scraper, we tenderly scrape the gunk off (with very little pressure).
I promise you it did not look this bad until you zoom in. My sister who is fastidious about cleaning never noticed it so don’t judge 🙂

It was remarkable who well it cleaned up. Looking at the bottom three images: before cleaning, after cleaning, and after oil.
And the finished table:

I took the opportunity to do more of our rails, leading edges and more….over a week’s time:


Nav station
Prop Cleaning
Matt whipped out the hooka to clean the props which had grown a bit hairy. He jumped in before I had a chance to take a before photo so all you get is his photo. Hooka, weight belt, cleaning tools and he is off to shave our props.

Matt with the hooka gear on
The props after their hair cut. The yellow is prop speed which helps keep the growth to a minimum.

Raw Water Pump Repair
The port side raw water pump needed to be serviced. Matt replaced a bearing and the shaft. In the left photo you can see the old and new shaft along with the bearing. While he had the pump off he also replaced the hose to the raw water pump. The old and new. What a difference.

Random $hit:
On one of our walks we encountered the lovely ladies who were crafting gorgeous floral crowns and necklaces. Not only were they stunning, but they smelled devine!

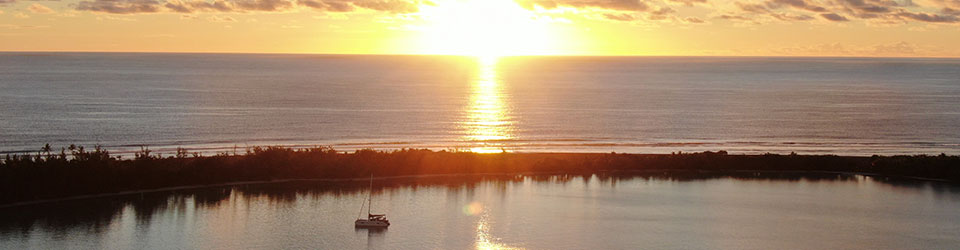
Just a beautiful photo of Sugar Shack on a particularly calm day. I was snorkeling back to the boat and popped my head up to get my bearings. It was just so pretty I had to share it with you. You can see how clear the water is as the coral heads are apparent.

Did you meet the sharks, rays, and fish in Vaiare in our last blog.
Events from this blog post occurred during the third week of August, 2021. Our blog posts run 10-12 weeks behind our adventures.